
Here it is! As requested by my good friend Plhong, a step by step tutorial on how I created the images from this blog entry. I managed to get to step 13 of the picture tutorial but was getting exhausted after that so *light-bulb moment* decided to do a screencast. ERRRR.. check it out here:
BYEE.. hahaha.. my little one was just sitting beside me while I was doing the whole thing - GURRGLING. :)
Anyway, you can view it fullscreen so you see all the itty-bitty details or pause between steps so you can follow at your own pace. I've also included the picture tutorial (up to step 13 only) that you can view if you read on down. Oh, this is also intended for intermediate Photoshop users. If your a beginner, there are hundreds of free tutorials online or you can check out some awesome tutorials specifically for bloggers here at Pugly Pixel (we share the same name too! shes awesome. that means I'm awesome. no, shes awesome.)
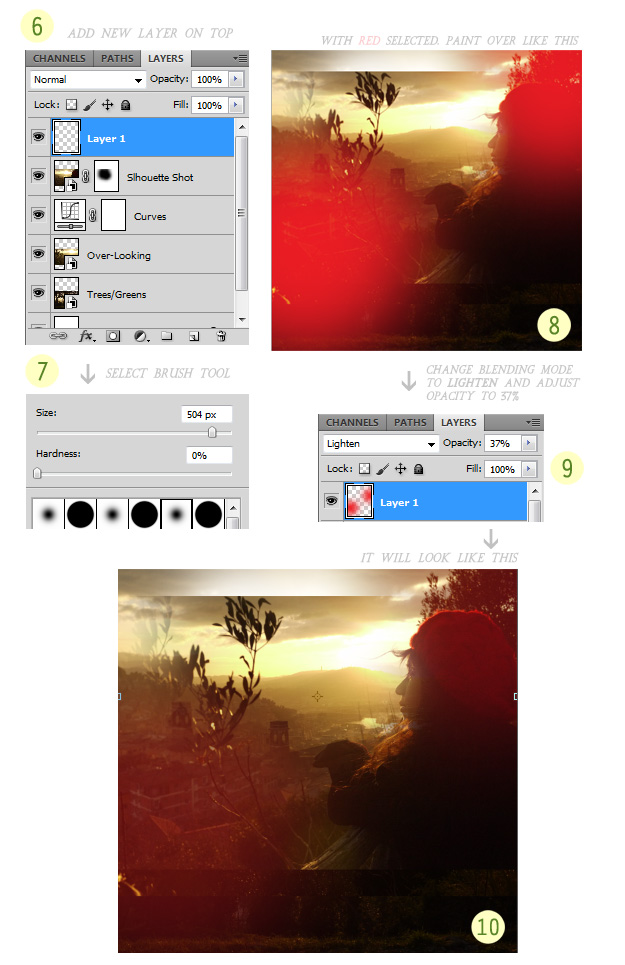
And sure I'd really LOVE to see what you come up with using this technique. The lighting and photos may vary so you can be flexible and play with all of the color-adjustments (precision is not important as long as you have the look you want in mind). For this project I was really just thinking about the contrast of red and blue hues and the whimsy of twilight.
And sure I'd really LOVE to see what you come up with using this technique. The lighting and photos may vary so you can be flexible and play with all of the color-adjustments (precision is not important as long as you have the look you want in mind). For this project I was really just thinking about the contrast of red and blue hues and the whimsy of twilight.


What do you think? Ideas, suggestions, feedback welcome. :)
No comments:
Post a Comment